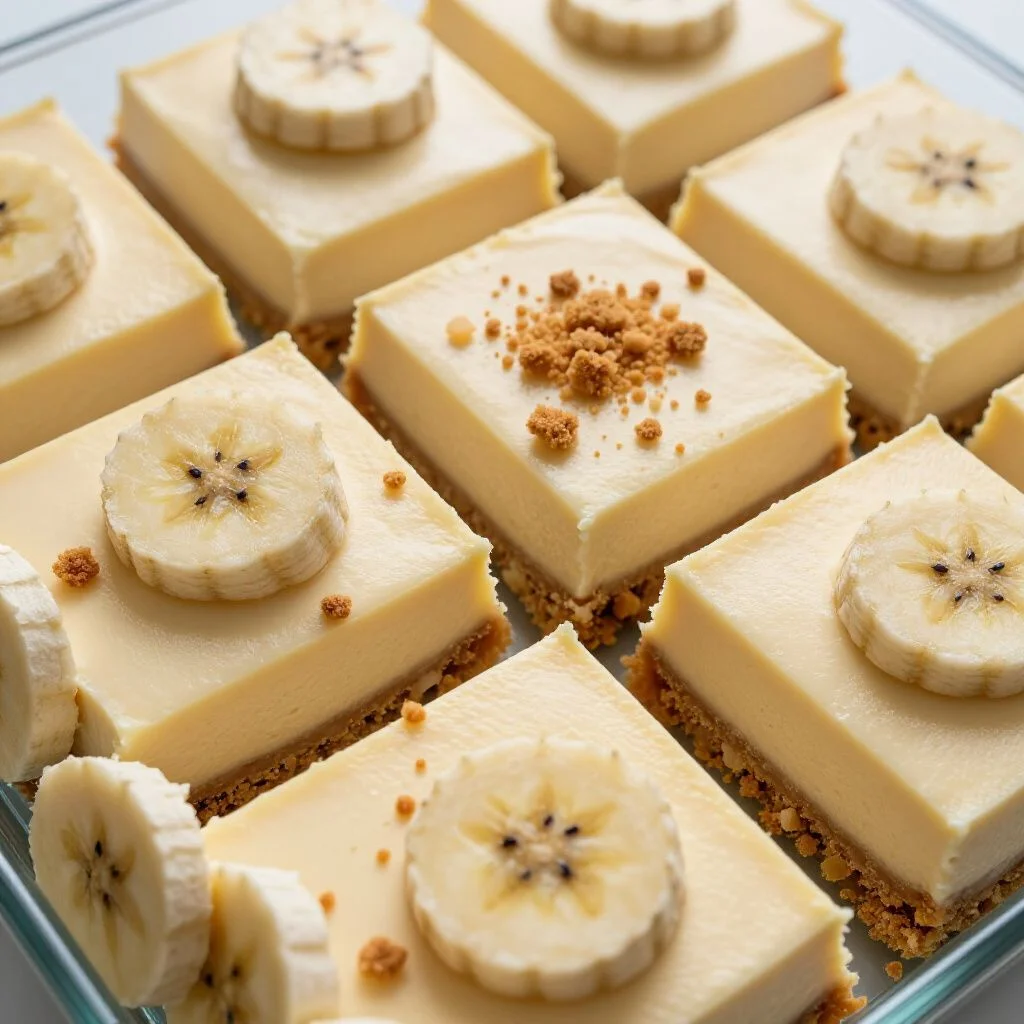
This easy **Banana** pudding cheesecake recipe combines creamy filling with Nilla wafers for a decadent treat that your whole family will absolutely love.
When two worlds of classic desserts collide, something truly magical happens in the kitchen. Banana Pudding Cheesecake Squares represent the ultimate marriage between the nostalgic, soul-warming comfort of a Southern banana pudding and the sophisticated, silky elegance of a New York-style cheesecake. If you have ever struggled to choose between a creamy bowl of pudding or a decadent slice of cake, this recipe is your delicious solution. This dessert isn’t just a treat; it’s a conversation starter at every potluck, holiday gathering, or Sunday dinner.
[ez-toc]
The beauty of the Banana Pudding Cheesecake Squares lies in the layers. We start with a buttery Nilla wafer crust that provides that signature crunch, followed by a rich cheesecake layer infused with real bananas and creamy vanilla. We then top it off with a fluffy whipped layer and more wafers for that iconic aesthetic. Using Banana as our primary flavor profile ensures a natural sweetness that pairs perfectly with the slight tang of cream cheese. Unlike traditional banana pudding which can sometimes become soggy, the cheesecake base provides a structural integrity that makes these squares easy to slice, serve, and enjoy on the go.
Why This Recipe Works
There are several reasons why these Banana Pudding Cheesecake Squares consistently receive five-star reviews from anyone who tries them. First, the balance of textures is impeccable. You get the crunch from the cookies, the velvet-like smoothness of the cheesecake, and the airy lightness of the whipped topping. It hits every sensory note a dessert lover looks for.
Secondly, this recipe is incredibly forgiving. Whether you are a seasoned baker or a novice, the steps are straightforward. By utilizing a few “shortcut” ingredients like instant pudding mix alongside fresh ingredients like ripe bananas, we achieve a professional-grade flavor without the stress of complicated pastry techniques. Furthermore, it is a fantastic make-ahead dessert. In fact, these squares actually taste better after they have sat in the refrigerator overnight, allowing the flavors to meld and the Banana essence to deepen. If you are looking for more creamy dessert inspiration, you might also want to check out our creamy raspberry cheesecake for a tart twist on the classic.
Ingredients for Banana Pudding Cheesecake Squares
To create the perfect Banana Pudding Cheesecake Squares, quality ingredients are key. Each component plays a specific role in building the flavor profile.
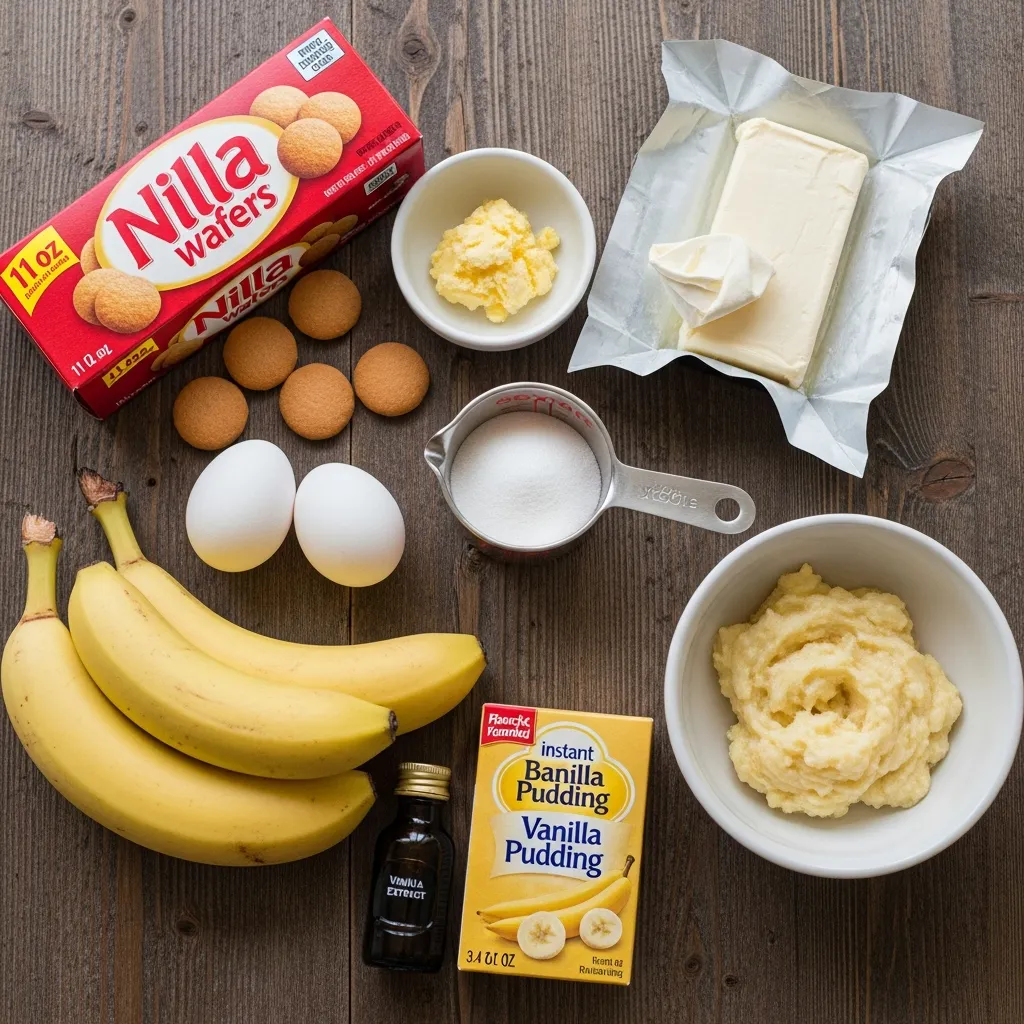
- Nilla Wafers (11 oz box): The classic choice for the crust and the garnish. Their vanilla flavor is essential for authenticity.
- Unsalted Butter (1/2 cup, melted): This acts as the glue for your cookie crust.
- Cream Cheese (16 oz, softened): Use full-fat brick cream cheese for the best stability and mouthfeel.
- Granulated Sugar (1/2 cup): To sweeten the cheesecake base without overpowering the fruit.
- Large Eggs (2): These provide the structure and lift during the baking process.
- Ripe Bananas (3 medium): You want bananas that are yellow with a few brown spots; these have the highest sugar content and best Banana aroma.
- Vanilla Extract (1 tsp): Enhances all the other flavors in the dish.
- Instant Vanilla Pudding Mix (3.4 oz box): This adds that specific “pudding” flavor and helps stabilize the topping.
- Cold Milk (1 cup): To whisk into the pudding mix.
- Whipped Topping (8 oz, thawed): This provides the light, airy finish on top of the dense cheesecake.
Equipment Needed
- 9×9-inch Baking Pan: A square pan is essential for creating those uniform squares.
- Parchment Paper: To allow for easy removal and “sling” lifting.
- Electric Hand Mixer or Stand Mixer: To ensure the cream cheese is perfectly smooth.
- Large Mixing Bowls: You will need at least two—one for the cheesecake and one for the pudding topping.
- Potato Masher or Fork: To mash the bananas into a smooth consistency.
- Offset Spatula: For smoothing out the layers to professional perfection.
Step by Step Guide
Follow these steps carefully to ensure your Banana Pudding Cheesecake Squares turn out perfectly every single time.
1. Prepare the Crust
Preheat your oven to 325°F (165°C). Line your 9×9-inch pan with parchment paper, leaving an overhang on the sides. Crush about 60 Nilla wafers into fine crumbs using a food processor. Mix the crumbs with the melted butter until the mixture resembles wet sand. Press this firmly into the bottom of your prepared pan. Bake for 8–10 minutes, then let it cool completely.
2. Make the Cheesecake Filling
In a large bowl, beat the softened cream cheese and sugar together until light and fluffy. Add the eggs one at a time, beating well after each addition. Stir in the mashed Banana and vanilla extract. Be careful not to over-mix at this stage, as too much air can cause the cheesecake to crack. Pour the mixture over the cooled crust and smooth the top.
3. Bake and Cool
Bake for 35–40 minutes, or until the edges are set but the center still has a slight jiggle. Turn off the oven and crack the door, letting the cheesecake sit inside for 10 minutes. This prevents sudden temperature changes. Remove and cool to room temperature, then refrigerate for at least 4 hours.
4. Add the Pudding Layer
Whisk the instant pudding mix with 1 cup of cold milk for 2 minutes until thickened. Gently fold in half of the whipped topping. Spread this mixture evenly over the chilled cheesecake layer.
5. Final Garnish
Spread the remaining whipped topping over the pudding layer. Decorate the top with whole Nilla wafers and extra Banana slices (if serving immediately). Chill for another hour before slicing into squares.
To Incorporate With
These Banana Pudding Cheesecake Squares are a rich dessert, so they pair best with beverages that provide a bit of contrast. A strong cup of black coffee or a cold glass of milk is the traditional choice. For a more festive occasion, a light dessert wine or a vanilla-infused latte works beautifully.
If you are planning a full dessert spread, these squares look beautiful next to other finger-food sweets. You might consider serving them alongside keto almond flour cookies for guests who are looking for a low-carb alternative, though these cheesecake squares are definitely the “full-indulgence” star of the show.
Varieties and Substitutions
While the classic version is hard to beat, there are many ways to customize your Banana Pudding Cheesecake Squares.
- The Crust: If you don’t have Nilla wafers, you can use Graham crackers or even Biscoff cookies for a deep, caramelized flavor.
- Chocolate Twist: Drizzle the top with melted chocolate or add mini chocolate chips into the cheesecake batter. Banana and chocolate are a match made in heaven.
- Extra Crunch: Sprinkle crushed toasted pecans or walnuts between the cheesecake and pudding layers for an added textural element.
- Healthy Swap: For a slightly lighter version, use Greek yogurt in place of half the cream cheese, though the texture will be slightly less dense.
For more inspiration on similar flavor profiles, you can search for more banana pudding inspiration on AllRecipes or browse variations of cheesecake bars on Food.com.
Tips for Success
To ensure your Banana Pudding Cheesecake Squares look like they came from a high-end bakery, keep these professional tips in mind:
- Room Temperature Ingredients: Ensure your cream cheese and eggs are at room temperature. This prevents lumps in your batter, ensuring a Banana filling that is perfectly smooth.
- Don’t Over-mash: While you want the bananas smooth, leave a few tiny chunks if you prefer a more rustic, “real fruit” texture.
- The Clean Slice: To get perfectly clean squares, dip your knife in hot water and wipe it dry between every single cut. This prevents the pudding and whipped cream from smearing.
- Preventing Soggy Cookies: If you are adding fresh Banana slices to the top for garnish, do so right before serving. Fresh bananas oxidize (turn brown) quickly and can release moisture into the whipped topping.
10 Frequently Asked Questions (FAQ)
1. Can I use frozen bananas for this recipe?
Yes, but make sure to thaw them completely and drain any excess liquid before mashing. Frozen bananas are often softer, which makes them easy to incorporate into the Banana cheesecake base.
2. How long do these squares last in the fridge?
They stay fresh for about 3–4 days. Keep them in an airtight container to prevent them from absorbing other fridge odors.
3. Can I freeze Banana Pudding Cheesecake Squares?
You can freeze the baked cheesecake layer and crust. However, the pudding and whipped topping layers do not freeze and thaw well, as they can become watery. It is best to add the top layers fresh.
4. Why did my cheesecake crack?
Usually, cracks are caused by over-mixing the eggs or cooling the cake too quickly. Follow the “oven-door-crack” method mentioned in the steps to avoid this.
5. Can I use homemade whipped cream instead of whipped topping?
Absolutely! Just ensure you stabilize the whipped cream (using a bit of gelatin or extra powdered sugar) so it doesn’t deflate over time.
6. Is there a gluten-free version?
Yes, simply substitute the Nilla wafers with your favorite gluten-free vanilla wafer brand. The rest of the ingredients are naturally gluten-free.
7. What if my bananas aren’t ripe enough?
You can ripen bananas quickly by placing them in a 300°F oven for 15 minutes until the skins turn black. Let them cool before mashing for your Banana mixture.
8. Can I use banana pudding mix instead of vanilla?
Yes! This will intensify the Banana flavor. Many people prefer this for an extra punch of fruitiness.
9. How do I make the crust not crumble?
Make sure the crumbs are very fine and that you press them down firmly with the bottom of a flat glass or measuring cup.
10. Can I make this in a 9×13 pan?
You can, but the layers will be much thinner. If you want thick, decadent squares in a 9×13 pan, you should double the recipe.
Conclusion
The Banana Pudding Cheesecake Squares are a true testament to why classic flavors never go out of style. By combining the creamy, nostalgic elements of a childhood favorite with the sophisticated structure of a baked cheesecake, you create a dessert that appeals to all ages. Whether you’re serving this at a summer BBQ or as a special treat for a weekend at home, the natural sweetness of the Banana and the buttery crunch of the wafers are guaranteed to satisfy any sweet tooth.
For more creative dessert ideas and to see how others are styling their treats, explore creative cheesecake bar ideas on Pinterest. Don’t forget to share your results and tag us in your baking adventures!
PrintBanana Pudding Cheesecake Squares: 7 Ultimate Tips for the Easiest Dessert
- Total Time: 5 hours 10 minutes
- Yield: 16 squares 1x
Description
A decadent fusion of traditional Southern banana pudding and rich, creamy cheesecake baked into easy-to-serve squares with a vanilla wafer crust.
Ingredients
- 11 oz Vanilla Wafers
- 1/2 cup Unsalted Butter, melted
- 24 oz Cream Cheese, softened
- 3/4 cup Granulated Sugar
- 3 Large Eggs
- 3.4 oz Instant Banana Cream Pudding Mix
- 1/2 cup Sour Cream
- 2 tsp Vanilla Extract
- 3 Fresh Bananas, sliced
- 2 cups Whipped Topping
Instructions
- Preheat oven to 350°F and line a 9×13 pan with parchment.
- Crush wafers and mix with melted butter; press into pan and bake for 10 minutes.
- Beat cream cheese, sugar, pudding mix, sour cream, and vanilla until smooth.
- Add eggs one at a time on low speed.
- Pour batter over crust and bake for 35-40 minutes.
- Cool completely, then layer with sliced bananas and whipped topping.
- Chill for at least 4 hours before slicing and serving.
Notes
Combines two classic desserts into a portable, easy-to-slice format that is perfect for parties.
- Prep Time: 30 minutes
- Cook Time: 40 minutes
Nutrition
- Calories: 385 kcal