Naturally Blue Cabbage Dyed Deviled Eggs: 7 Easy Steps for the Most Stunning Appetizer
Learn how to make Naturally Blue Cabbage Dyed Deviled Eggs with this simple guide to creating vibrant, edible art using only natural ingredients for your next party.
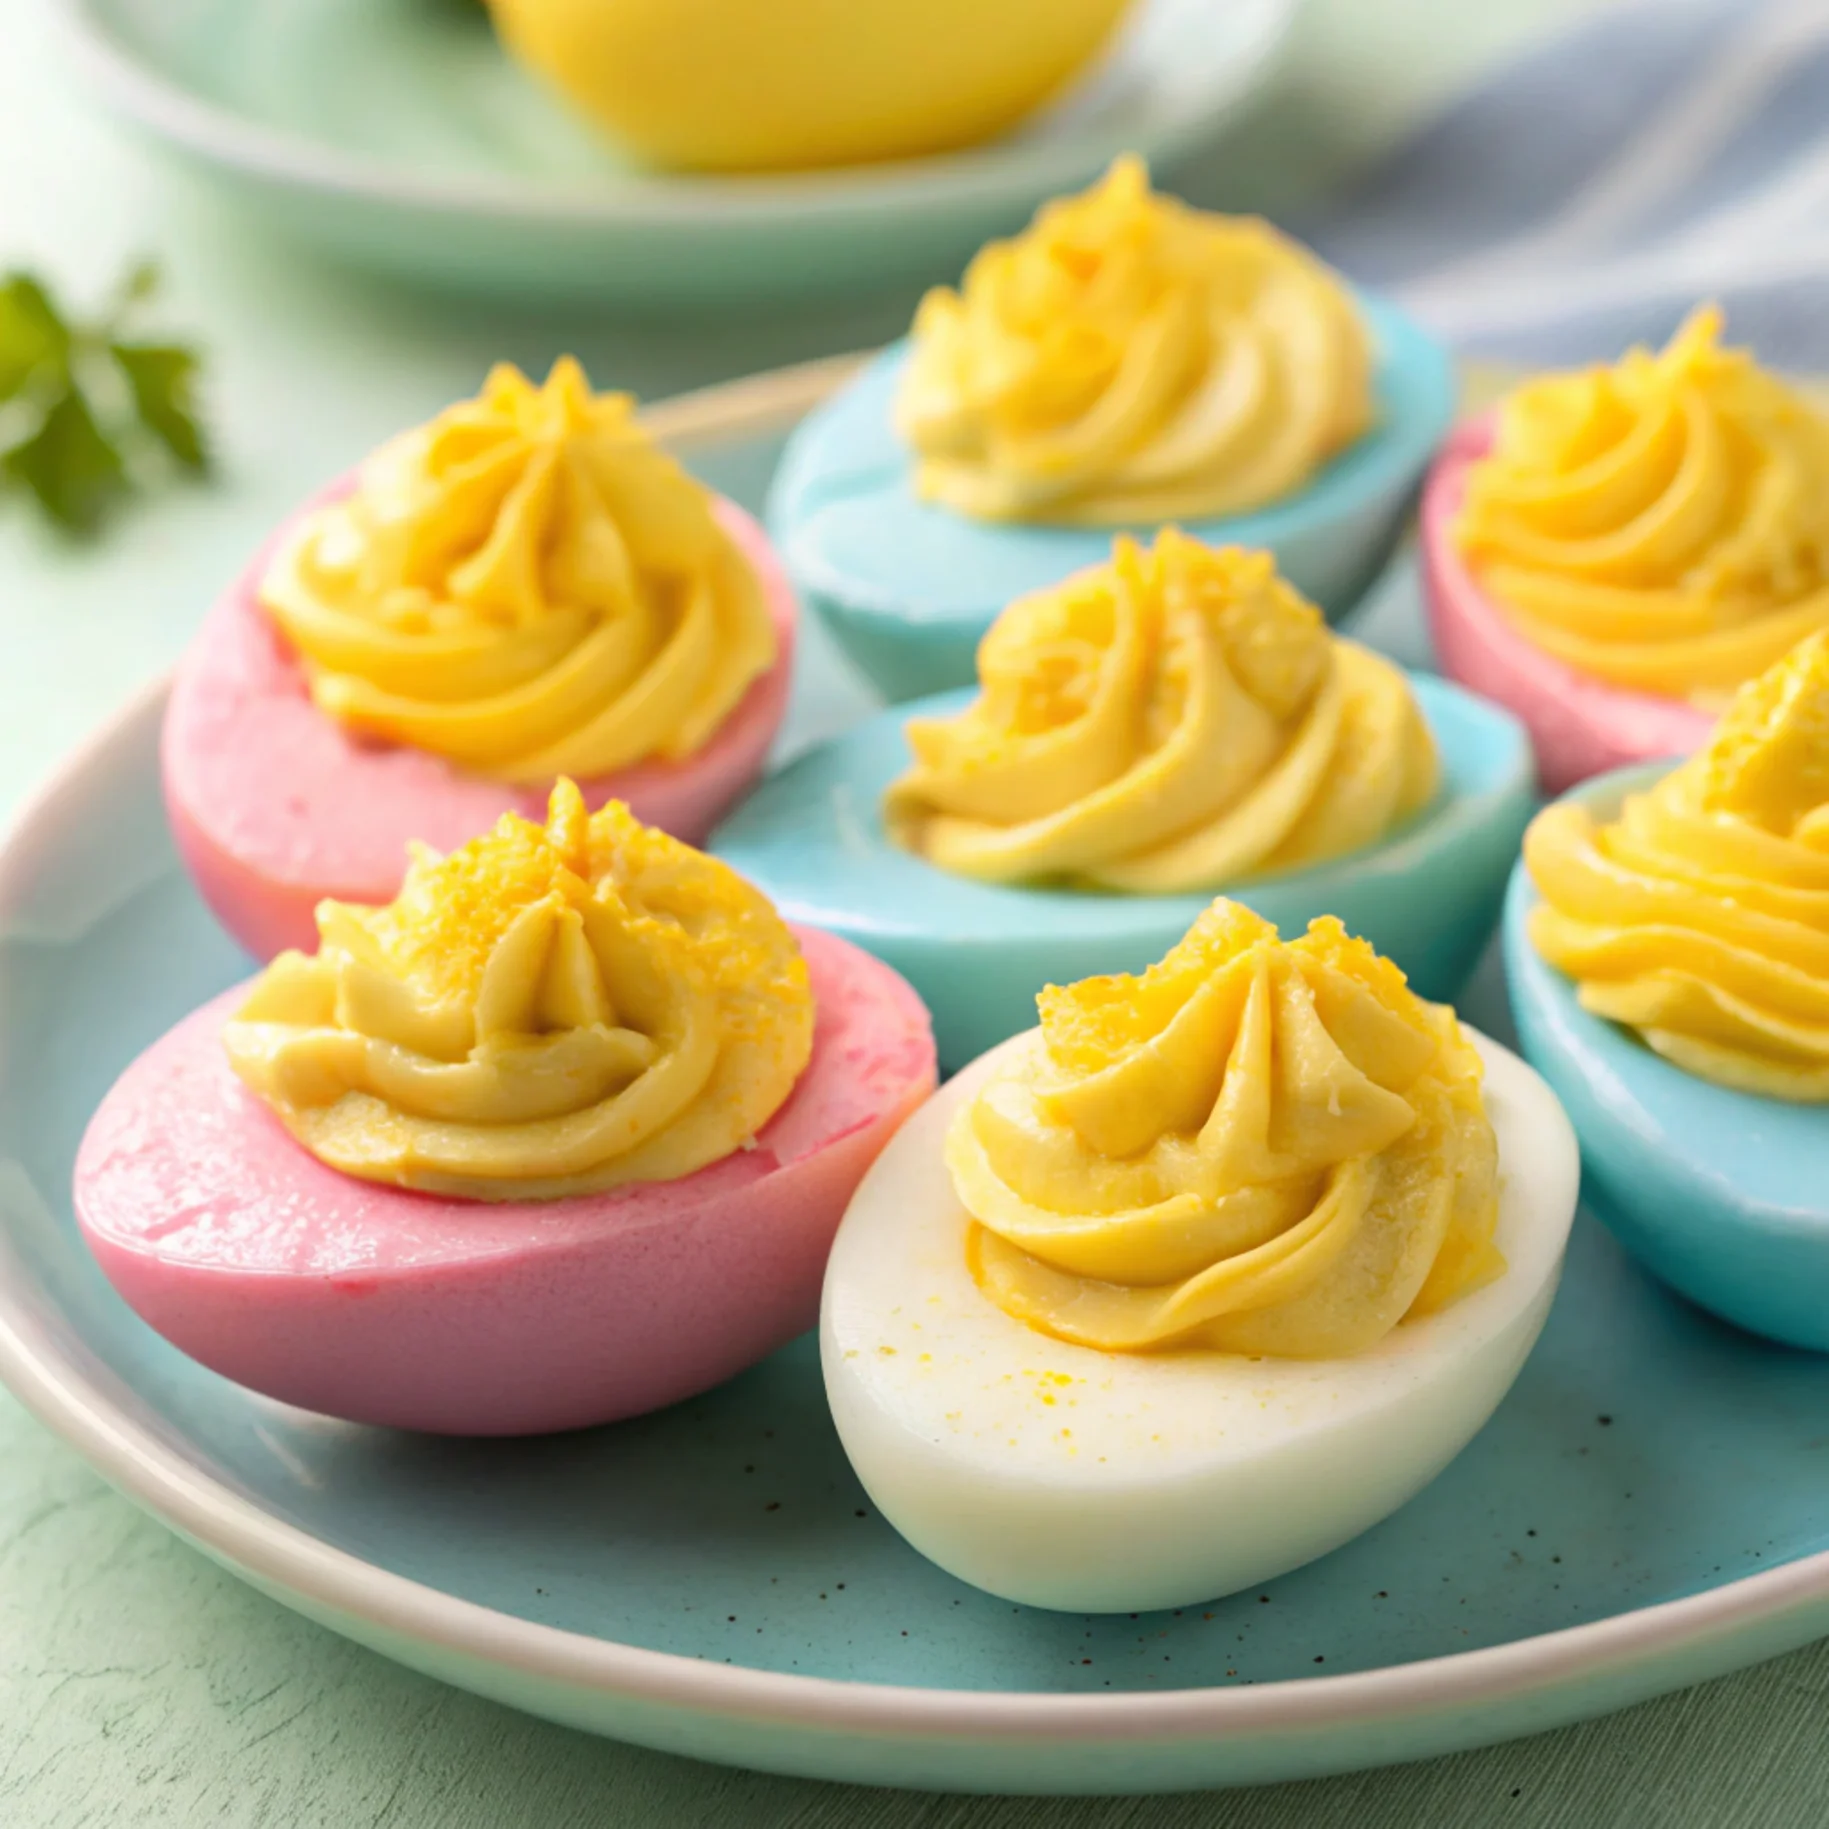
There is something truly magical about turning a standard grocery store staple into a work of art without a single drop of artificial food coloring. When you make Naturally Blue Cabbage Dyed Deviled Eggs, you aren’t just making a snack; you are performing a culinary science experiment that results in a show-stopping centerpiece. These eggs feature a mesmerizing robin’s egg blue hue that looks like it was plucked straight from a fairytale. Whether you are preparing for an elegant Easter brunch, a whimsical baby shower, or a sophisticated garden party, these Blue Cabbage dyed treats are guaranteed to be the most talked-about item on the menu.
[ez-toc]
The secret lies in the humble red cabbage. While it appears purple in its raw form, the anthocyanins (natural pigments) in the cabbage react to the alkaline nature of the egg whites, shifting the color spectrum from purple to a stunning blue. This process is entirely organic, flavor-neutral, and incredibly satisfying to watch. In this guide, we will walk through the nuances of achieving the perfect shade, the best way to hard-boil your eggs for easy peeling, and how to create a filling that is just as impressive as the exterior.
Why This Recipe Works
The primary reason this recipe is a winner is the visual “wow” factor. Most people are used to seeing pale yellow eggs, so the vibrant Blue Cabbage tint immediately grabs attention. Beyond the aesthetics, this recipe works because it relies on the chemical reaction between the cabbage juice and the egg white protein. Unlike synthetic dyes which can sometimes leave a bitter aftertaste or stain your fingers, this natural method is clean and safe.
Furthermore, these Naturally Blue Cabbage Dyed Deviled Eggs are incredibly versatile. You can adjust the soaking time to achieve anything from a light pastel sky blue to a deep, moody teal. Because the dye is made from a vegetable, it fits perfectly into a whole-foods-based lifestyle. If you are hosting guests with dietary restrictions, you’ll be pleased to know this recipe is naturally gluten-free and can easily be made keto-friendly by choosing the right mayonnaise.
Lastly, it is a great “make-ahead” appetizer. You can dye the whites a day in advance and store them in the fridge, making your party-day preparations much smoother. If you are looking for other impressive party treats, you might also enjoy serving these alongside a decadent raspberry cheesecake for a beautiful color contrast on your dessert table.
Ingredients for Naturally Blue Cabbage Dyed Deviled Eggs
To achieve the perfect Blue Cabbage tint, you need high-quality ingredients. The fresher the cabbage, the more vibrant the pigment will be.
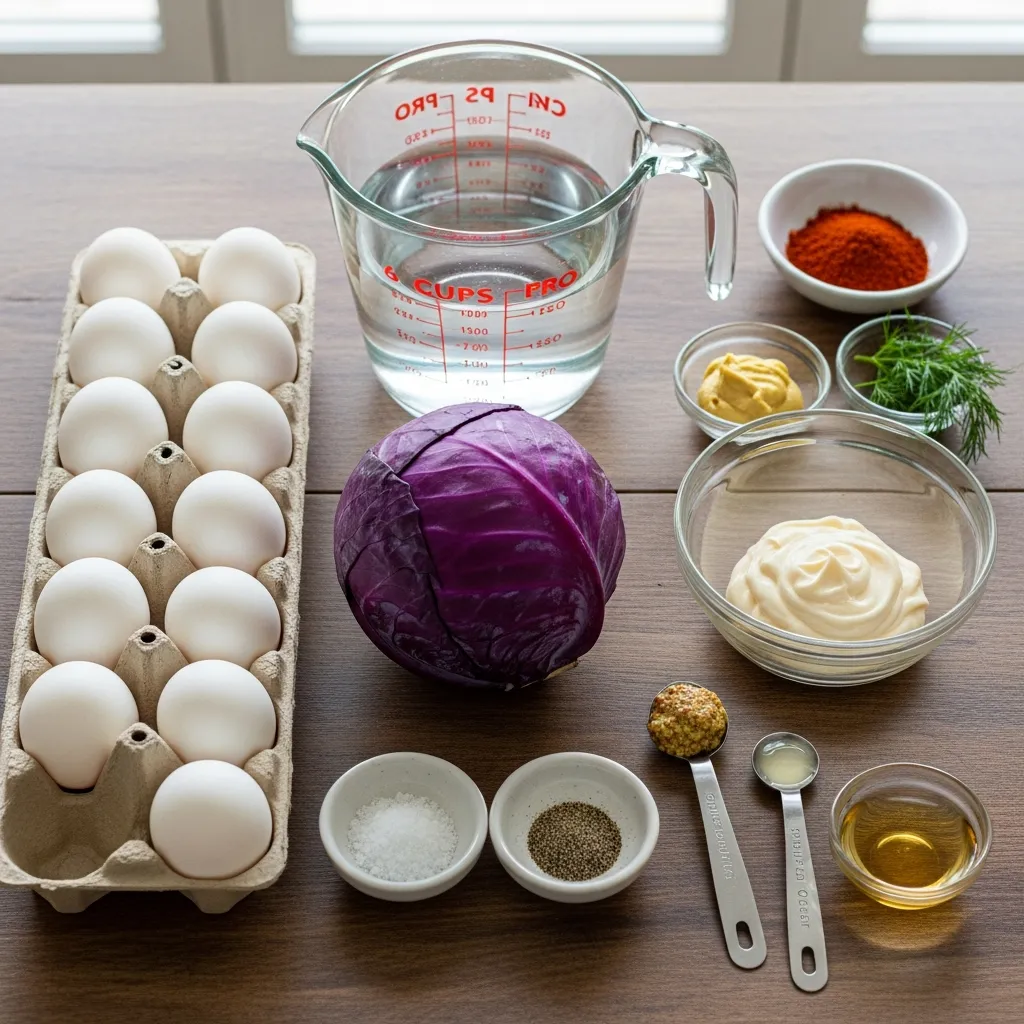
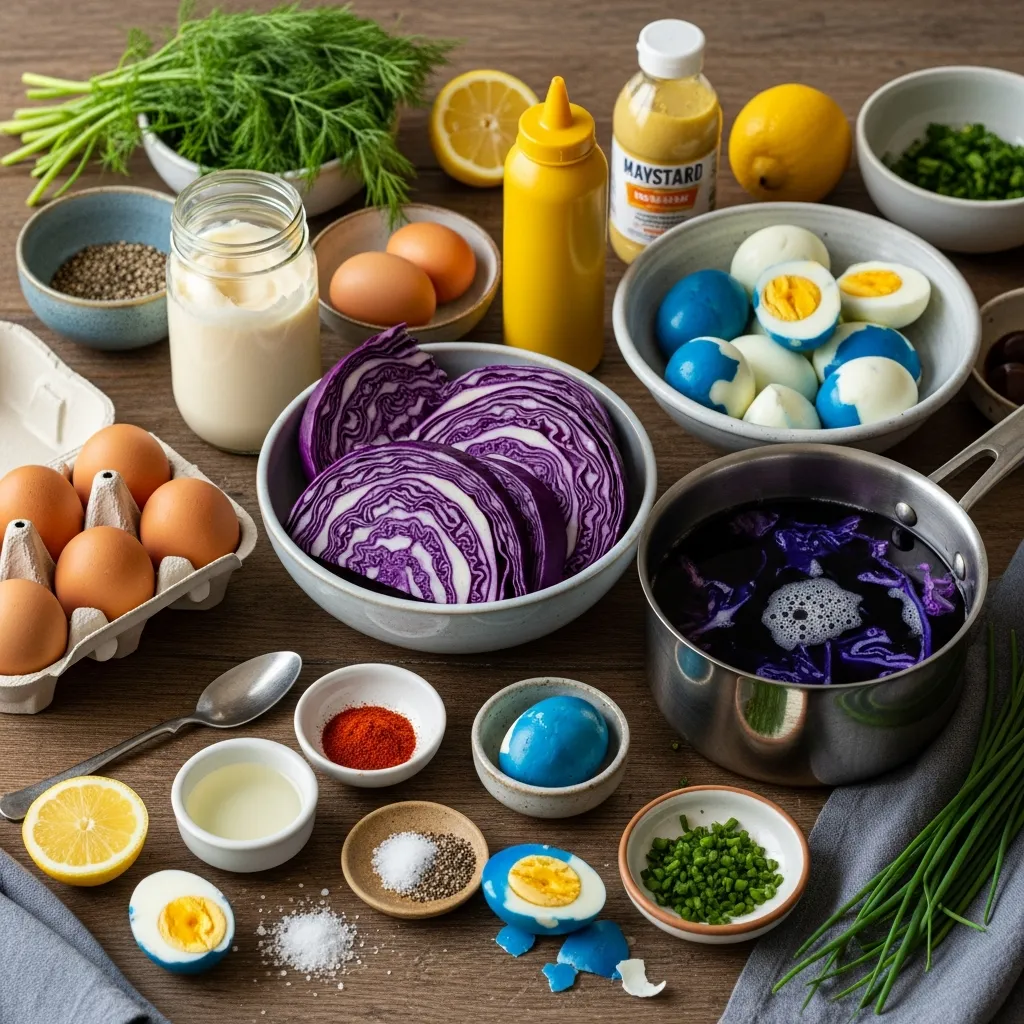
- 12 Large Eggs: Older eggs actually peel better than farm-fresh ones!
- 1 Small Head of Red Cabbage: Roughly chopped (this is what creates the blue dye).
- 6 Cups Water: For boiling the cabbage.
- 1/2 Cup Mayonnaise: Use a high-quality brand for the creamiest texture.
- 2 Teaspoons Dijon Mustard: Adds a sophisticated tang.
- 1 Tablespoon Apple Cider Vinegar: To balance the richness of the yolk.
- Salt and Black Pepper: To taste.
- Optional Garnishes: Fresh dill, smoked paprika, or microgreens.
Equipment
- Large stockpot
- Medium saucepan
- Fine-mesh strainer
- Large glass bowl (avoid plastic as it may stain)
- Slotted spoon
- Piping bag with a star tip (for a professional look)
Step by Step Guide to Blue Cabbage Deviled Eggs
Following these steps ensures that your Naturally Blue Cabbage Dyed Deviled Eggs come out perfectly every time without any gray rings around the yolks.
Step 1: Prepare the Natural Dye
Place your chopped red cabbage into a large stockpot and cover with 6 cups of water. Bring to a boil, then reduce heat and simmer for about 15–20 minutes. You will see the water turn a deep, dark purple. Remove from heat and let it cool slightly. Strain the liquid into a large glass bowl, discarding the boiled cabbage pieces. Let the liquid cool completely to room temperature.
Step 2: Hard-Boil the Eggs
While the dye is cooling, place your eggs in a single layer in a saucepan and cover with cold water. Bring to a rolling boil, then immediately turn off the heat and cover the pan with a lid. Let the eggs sit in the hot water for exactly 12 minutes. This method ensures a creamy yolk without the sulfurous green ring.
Step 3: The Ice Bath
Immediately transfer the eggs to a bowl filled with ice and water. Let them chill for at least 10 minutes. This “shocks” the eggs, making the shell easier to remove from the delicate whites.
Step 4: Peel and Separate
Gently crack the shells and peel the eggs under cold running water. Slice each egg in half lengthwise. Remove the yolks and place them in a separate mixing bowl. Set the yolks aside for the filling.
Step 5: The Dyeing Process
Submerge the empty egg white halves into the cooled Blue Cabbage liquid. Ensure they are fully covered. For a light blue, soak for 30 minutes. For a deep, vibrant blue, leave them in the liquid for 2 to 4 hours in the refrigerator. Check them periodically until you reach your desired shade.
Step 6: Prepare the Filling
Mash the egg yolks with a fork until they are fine crumbles. Add the mayonnaise, Dijon mustard, apple cider vinegar, salt, and pepper. Stir until the mixture is completely smooth and creamy.
Step 7: Assemble and Serve
Remove the Blue Cabbage dyed whites from the liquid and pat them dry gently with a paper towel. Use a piping bag to fill the blue cavities with the golden yolk mixture. Garnish as desired and serve chilled.
To Incorporate With
These eggs are the ultimate appetizer, but they pair beautifully with other items to create a full spread. Because they are savory and slightly tangy, they go well with salty meats like prosciutto or smoked salmon. If you are hosting a brunch, serve them alongside keto almond flour cookies to provide a low-carb sweet option for your guests.
You can also find more inspiration by looking at Search for similar recipes on Pinterest to see how others style their natural food creations.
Varieties / Substitutions
If you want to experiment beyond the Naturally Blue Cabbage Dyed Deviled Eggs, here are a few ideas:
- Purple Eggs: If you add a tablespoon of vinegar to the cabbage dye, the pH changes and the liquid will stay purple/pink rather than turning blue.
- Turmeric Yellow: Boil water with 2 tablespoons of turmeric for a bright yellow contrast to your blue eggs.
- Spicy Filling: Add a teaspoon of Sriracha or chopped jalapeños to the yolk mixture for a kick.
- Avocado Filling: Replace half the mayo with mashed avocado for a “Green and Blue” earthy look.
Tips for Success
To get the best results with your Blue Cabbage experiment, keep these tips in mind:
- Use Glass Bowls: The cabbage dye is very strong and can stain plastic containers permanently.
- Cool the Dye: Never put warm egg whites into hot dye, or they will continue to cook and become rubbery.
- Dry Thoroughly: If the whites are still wet when you pipe the filling, the yolk mixture might slide out. Pat them dry with a lint-free paper towel.
- Adjust pH: If your dye isn’t turning blue enough, it’s because the environment isn’t alkaline enough. Egg whites are naturally alkaline, which is why they turn blue, but you can add a tiny pinch of baking soda to the dye to push the color further into the blue/teal range.
10 FAQ
1. Does the blue dye taste like cabbage?
Surprisingly, no! Once the eggs are rinsed and filled, there is no detectable cabbage flavor.
2. How long do these eggs last?
They are best served the day they are made, but you can store them in an airtight container in the fridge for up to 2 days.
3. Can I use purple cabbage instead?
Yes, “red cabbage” and “purple cabbage” refer to the same vegetable, which is necessary for this blue result.
4. Why did my eggs turn green?
If the dye is very concentrated or the eggs soak for too long (over 12 hours), the yellow tint of the white might blend with the blue to look slightly greenish.
5. Can I dye the whole egg with the yolk inside?
You can, but the yolk will also turn a dark, unappetizing color. It is best to separate them first.
6. Is this recipe safe for children?
Absolutely! It’s a great way to avoid artificial dyes which some children are sensitive to.
7. What if I can’t find red cabbage?
Unfortunately, only red cabbage contains the specific anthocyanins needed for this blue reaction. Blueberries can work, but they often leave a fruity flavor.
8. Can I make the filling ahead of time?
Yes, you can keep the filling in a sealed piping bag for up to 24 hours before assembling.
9. How do I get a “marble” effect?
Cracked the shells of the hard-boiled eggs but don’t peel them. Soak the whole cracked egg in the dye, then peel. You will have blue veins on the whites!
10. Where can I find more deviled egg variations?
You can Search for similar recipes on AllRecipes for more filling inspiration.
Conclusion
Mastering the art of Naturally Blue Cabbage Dyed Deviled Eggs is a rewarding experience that combines science and cooking. By using the natural power of Blue Cabbage, you create a dish that is healthy, beautiful, and free from chemicals. These eggs prove that you don’t need expensive tools or artificial additives to make something extraordinary. Next time you want to impress your guests, skip the standard appetizers and reach for a head of cabbage and a dozen eggs. You’ll be amazed at the stunning results!