

Discover how to bake these moist, guilt-free **brownies** using Greek yogurt for the ultimate healthy dessert that tastes indulgent.
When the craving for chocolate strikes, it usually hits hard. We’ve all been there—standing in the pantry, debating between our health goals and that box of sugary mix. But what if you didn’t have to choose? Enter the world of healthy baking, where these **brownies** reign supreme. By swapping out heavy oils and refined sugars for protein-packed Greek yogurt and natural sweeteners, you can achieve a dessert that feels naughty but is actually nice to your body.
The texture of these **brownies** is what truly sets them apart. They are incredibly fudgy, dense, and rich, avoiding the dry, cake-like texture that often plagues “diet” desserts. Whether you are on a keto journey, managing insulin levels, or just trying to cut back on sugar without sacrificing joy, this recipe is a game-changer. We are going to explore the science behind using yogurt in baking, the best sweeteners to avoid that chemical aftertaste, and how to ensure your **brownies** come out perfect every single time.
Why This Recipe Works
Baking is chemistry, and when you remove sugar and butter, you have to replace their structural roles. Sugar doesn’t just sweeten; it provides moisture and tenderness. Butter provides fat, which coats flour proteins to prevent toughness. Here is why this specific formula creates the perfect batch of **brownies**:
- Moisture Retention: Greek yogurt is hydroscopic, meaning it holds onto water. This ensures that your **brownies** stay moist for days, mimicking the texture usually achieved by massive amounts of butter.
- Acidity for Rise: The natural acidity in Greek yogurt reacts with baking soda (if used) or baking powder, creating tiny air bubbles. This gives just enough lift to keep the treat from becoming a heavy brick, while maintaining that coveted density.
- Protein Boost: Unlike traditional recipes that provide empty calories, the yogurt and eggs here add a significant protein punch, which helps stabilize blood sugar levels and keeps you fuller longer.
- Fat Replacement: While we do use some fat source (often cocoa butter or a small amount of oil), the creaminess of the yogurt mimics fat on the palate, tricking your brain into thinking you are eating something much higher in calories.
Ingredients
To make the best **brownies** of your life, quality ingredients matter. Since there are so few components, each one plays a critical role.
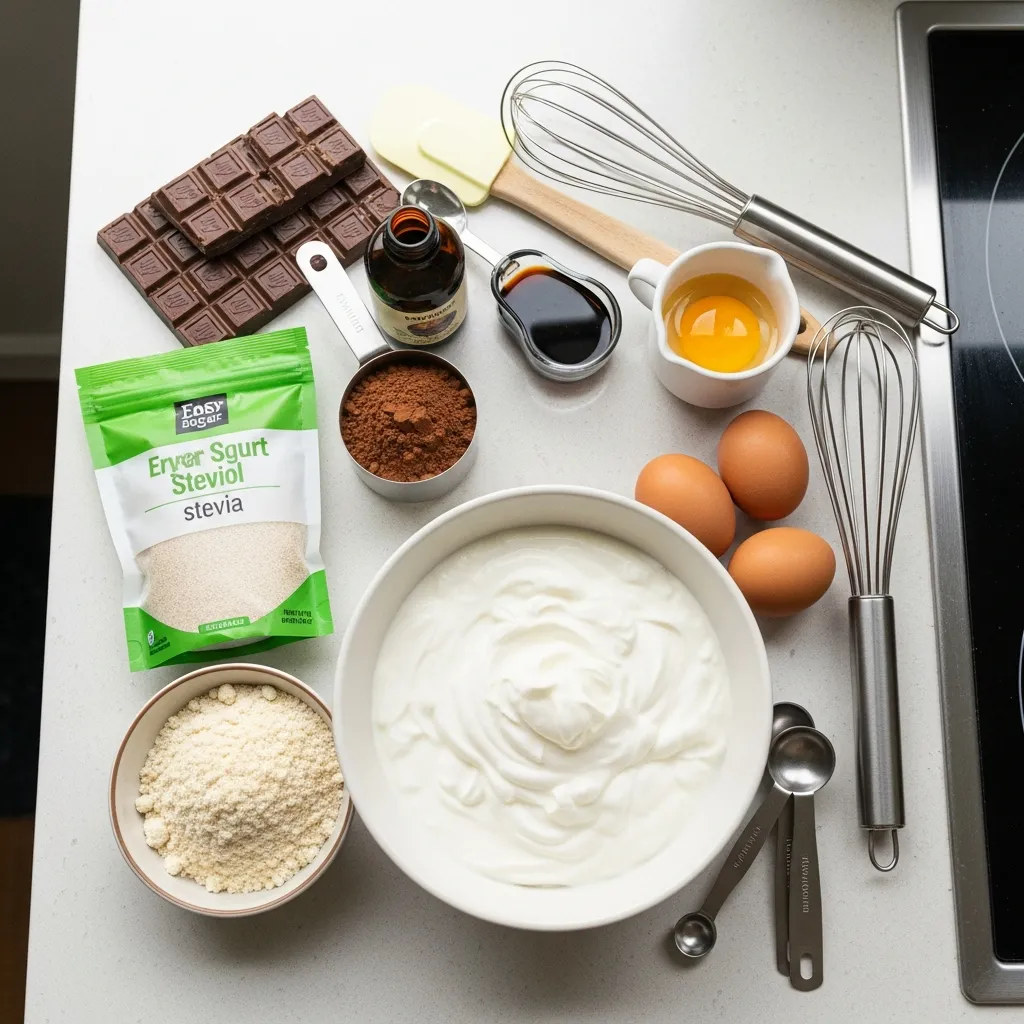
- Greek Yogurt: Use plain, full-fat Greek yogurt. 0% fat works, but 5% yields a much richer, fudgier result. Ensure it is strained and thick; watery yogurt will ruin the batter.
- Cocoa Powder: Dutch-processed cocoa powder is recommended for a smoother, less acidic chocolate flavor. It gives that deep, dark color we love in **brownies**.
- Sweetener: Granulated Erythritol or a Monk Fruit blend works best here. Liquid sweeteners (like stevia drops) can upset the liquid-to-dry ratio.
- Oat Flour or Almond Flour: For a gluten-free structure. Almond flour makes them denser (more keto-friendly), while oat flour makes them chewier.
- Eggs: Room temperature eggs mix better and provide the necessary structure to hold the **brownies** together.
- Vanilla Extract: Essential for enhancing the chocolate flavor.
- Salt: A pinch of sea salt balances the sweetness and cuts through the richness.
- Chocolate Chips: Sugar-free chocolate chips (like Lily’s) folded in for those pools of melted chocolate.
Equipment
You don’t need a professional kitchen to whip this up. Here is the basic gear required:
- 8×8 Baking Pan: Metal pans tend to bake sharper edges, while glass pans bake more evenly but slower.
- Parchment Paper: Non-negotiable for zero-sugar baking, as these **brownies** can be sticky.
- Mixing Bowls: One large for wet ingredients, one medium for dry.
- Whisk and Spatula: A silicone spatula is best for folding ingredients without overmixing.
- Wire Cooling Rack: Essential for stopping the cooking process once they leave the oven.
Step by Step Guide
Follow these steps closely to ensure your **brownies** have that perfect crackly top and fudgy center.
Step 1: Prep the Oven and Pan
Preheat your oven to 350°F (175°C). Line your 8×8 inch baking dish with parchment paper, leaving an overhang on the sides. This “sling” will make it easy to lift the **brownies** out later. Lightly grease the paper with coconut oil spray.
Step 2: Mix the Wet Ingredients
In a large bowl, whisk together the Greek yogurt, eggs, and vanilla extract. Whisk vigorously until the mixture is completely smooth and pale yellow. If you are using melted coconut oil or butter, stream it in slowly while whisking to emulsify the mixture.
Step 3: Combine Dry Ingredients
In a separate bowl, sift together the cocoa powder, flour (almond or oat), granulated sweetener, baking powder, and salt. Sifting is crucial here to break up any lumps in the cocoa powder, ensuring a smooth batter.
Step 4: The Fold
Pour the dry ingredients into the wet mixture. Switch to a silicone spatula. Gently fold the batter—do not whisk! Overmixing develops gluten (if using oat flour) or toughens the eggs, leading to rubbery **brownies**. Fold until just combined and no dry streaks remain.
Step 5: Add Mix-ins
Fold in your sugar-free chocolate chips or chopped nuts. Reserve a handful of chips to sprinkle on top before baking.
Step 6: Bake
Pour the batter into the prepared pan and smooth the top with the spatula. Bake for 20-25 minutes. The key is to underbake slightly. A toothpick inserted into the center should come out with a few moist crumbs attached, not wet batter, but definitely not clean.
Step 7: The Cool Down
This is the hardest part: let them cool completely in the pan. Zero-sugar **brownies** are fragile when hot. They need to set as they cool to achieve that fudgy texture.
To Incorporate With
These **brownies** are fantastic on their own, but they also serve as a base for more elaborate desserts. Here are a few ways to elevate your presentation:
- Protein Sundae: Warm a brownie slightly and top it with a scoop of halo top or homemade protein ice cream.
- Nut Butter Drizzle: If you love the combination of chocolate and peanut butter, check out our guide on keto peanut butter cups for inspiration on making a sugar-free peanut butter topping to drizzle over these.
- Berry Compote: Fresh raspberries or strawberries cut through the richness of the chocolate.
Varieties / Substitutions
Baking is adaptable. Here are ways to tweak the recipe for your specific dietary needs:
- Dairy-Free Option: Substitute Greek yogurt with a thick coconut yogurt (like Cocojune) or a dairy-free almond milk yogurt. Note that coconut yogurt will add a slight coconut flavor.
- Vegan Option: Use flax eggs (1 tbsp ground flaxseed + 3 tbsp water per egg) instead of chicken eggs. The **brownies** will be denser and less cakey.
- Flour Alternatives: If you don’t have almond flour, you can use sunflower seed flour for a nut-free version. If you are interested in how nut flours affect texture in low-carb baking, read about our keto almond flour cookies.
- Mint Chocolate: Add 1/2 teaspoon of peppermint extract for a festive twist.
Tips for Success
Even “easy” recipes have nuances. Keep these tips in mind to avoid common pitfalls associated with healthy **brownies**.
- Room Temperature Ingredients: Ensure your yogurt and eggs are at room temperature. Cold ingredients can cause the batter to seize up, especially if you are adding any melted coconut oil.
- Don’t Skimp on Sweetener: Cocoa is naturally bitter. Because there is no sugar to counteract it, you need the full amount of erythritol. If you reduce the sweetener, the **brownies** may taste metallic.
- The “Fudgy” Test: If you prefer cakey brownies, add an extra 1/2 teaspoon of baking powder. For fudgy ones, keep the leavening agent low.
- Research More: If you are looking for other variations, you can Search for similar recipes on AllRecipes to compare flour ratios.
10 FAQ
1. Can I taste the Greek Yogurt?
No. The strong flavor of the cocoa powder and the sweetness of the erythritol completely mask the tang of the yogurt. It simply provides moisture.
2. Can I freeze these brownies?
Yes! These **brownies** freeze beautifully. Wrap them individually in parchment paper and store them in a ziplock bag for up to 3 months. Thaw on the counter for 30 minutes before eating.
3. Why are my brownies gummy?
Gumminess usually comes from underbaking or cutting into them while they are still hot. Allow them to cool completely to set the structure.
4. Can I use Stevia?
Granulated stevia blends work, but pure liquid stevia often lacks the bulk needed for the batter. If you use liquid, you may need to add more flour.
5. How do I store them?
Store them in an airtight container in the refrigerator for up to 5 days. Because of the yogurt content, they last longer in the fridge than on the counter.
6. Can I use regular yogurt?
It is not recommended. Regular yogurt has too much whey (liquid), which will make the batter runny and the result soggy. Stick to Greek or Icelandic (Skyr) yogurt.
7. Are these Keto-friendly?
Yes, if you use almond flour and a keto-approved sweetener like erythritol or allulose, these are low carb and keto-friendly.
8. Can I add protein powder?
You can replace about 1/4 cup of the flour with chocolate protein powder, but be careful as whey protein can dry out baked goods. Casein blends bake better.
9. Why did my brownies sink in the middle?
This is common with fudgy **brownies** and is actually a good sign of density! However, if they sunk drastically, they may be underbaked. You can look for more troubleshooting tips if you search for sugar-free baking tips on Pinterest.
10. What is the best cocoa powder to use?
High-fat Dutch-processed cocoa powder provides the best flavor. Avoid generic “baking cocoa” if possible, as it can be very acidic.
Conclusion
Making healthier choices doesn’t mean saying goodbye to your favorite treats. These Easy Zero-Sugar Greek Yogurt **Brownies** prove that you can have your cake (or brownie) and eat it too. They are quick to assemble, require minimal equipment, and deliver a chocolatey satisfaction that rivals any bakery.
Whether you bake them for a post-workout snack, a kid-friendly dessert, or a late-night treat, this recipe is bound to become a staple in your kitchen. Remember to let them cool, experiment with your toppings, and most importantly, enjoy every guilt-free bite.